How to Test a Battery Charger
When you need to test a battery charger, accuracy and safety are paramount. Testing a battery charger starts with examining the charger’s physical condition and verifying its compatibility with your device and battery.
Using a multimeter, you can measure the output voltage precisely and compare it against the manufacturer’s specifications. But understanding what these measurements mean, and how to test under real operating conditions, requires a methodical approach.
This approach goes beyond simple voltage checks to ensure the charger functions correctly and safely.
Key Takeaways
- Verify charger and battery specifications match to ensure safe and accurate testing.
- Use a multimeter set to the correct voltage range to measure charger output voltage and polarity.
- Connect a load tester set to the battery’s rated current to observe voltage stability under load.
- Inspect charger cables, connectors, and casing for physical damage, corrosion, or wear before testing.
- Monitor charger temperature during testing to detect overheating or malfunction risks.
Preparing to Test Your Battery Charger
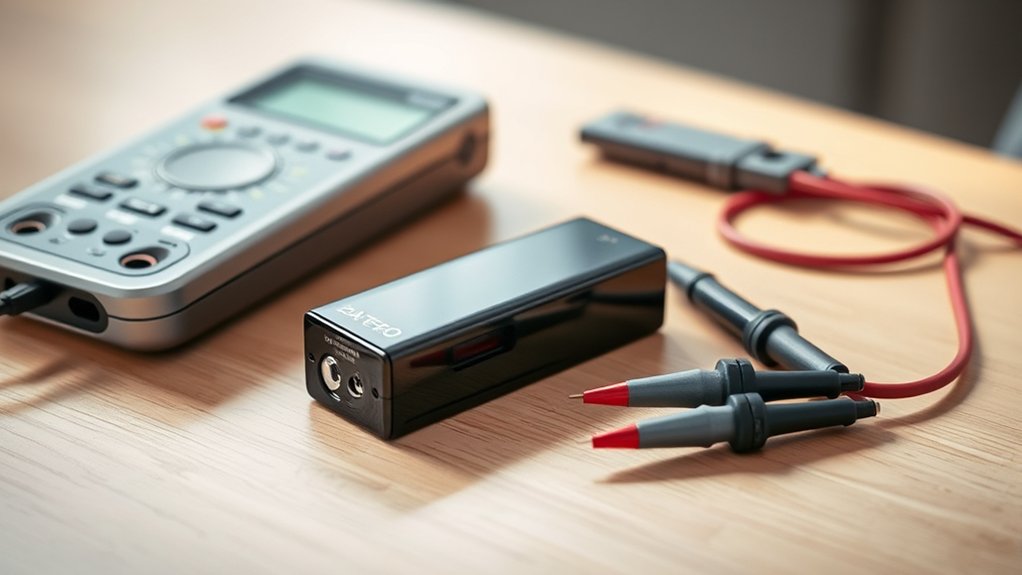
Before testing your battery charger, make sure you have a clear workspace free of conductive materials to prevent accidental shorts. Preparing to test requires that you verify the charger and battery specifications match to avoid damage or inaccurate results.
Inspect the charger’s cables and connectors for wear or corrosion, as compromised components can affect performance and safety. Always wear protective gear such as gloves and safety glasses, prioritizing battery safety to mitigate risks from potential leaks or sparks.
Use a multimeter to confirm the charger is unplugged before connecting any devices. Properly grounding your test area helps prevent static discharge. By following these precise steps, you reduce hazards and create a controlled environment, ensuring your testing process yields reliable, repeatable data without compromising safety.
How to Test Different Types of Battery Chargers (Phone, Laptop, and More)
How do you accurately test different types of battery chargers, such as those for phones, laptops, and other devices? Begin by verifying charger compatibility with the specific device to ensure proper voltage and current output. Using an original or certified charger reduces risks related to battery safety.
Examine the charger’s physical condition. Frayed cables or damaged connectors can compromise performance and safety. Connect the charger to the device and observe charging indicators to confirm functionality.
Monitor for excessive heat, which may indicate malfunction and jeopardize battery safety. For devices with removable batteries, test charging with a known good battery to isolate charger issues.
Avoid using incompatible chargers, as they can cause overvoltage or undervoltage, damaging the battery or device circuitry. This systematic approach ensures accurate assessment across varied charger types.
Using a Multimeter to Check Battery Charger Output
To accurately measure your battery charger’s output, you’ll need to set your multimeter to the correct voltage range based on the charger’s specifications. Once you connect the probes to the charger’s terminals, observe the reading and compare it to the expected output voltage.
This comparison will help you determine if the charger is functioning within its designed parameters or if it requires further inspection.
Setting Multimeter Voltage
A multimeter must be correctly set to measure voltage before you check your battery charger’s output. Improper settings can compromise charging safety and potentially void your warranty coverage. Follow these steps to configure your multimeter accurately:
- Select the DC voltage mode (V⎓), since battery chargers output direct current.
- Choose a voltage range slightly higher than the charger’s rated output to avoid damaging the meter.
- Connect the multimeter probes correctly, red to positive and black to negative terminals, to ensure precise polarity reading.
Interpreting Measurement Results
Once you’ve set your multimeter correctly and connected it to the battery charger, interpreting the voltage reading becomes your next task. Focus on comparing the displayed voltage against the charger’s specified output range. A reading within tolerance indicates proper function, while significant deviations suggest potential faults.
Pay close attention to measurement accuracy. Ensure your multimeter’s calibration is current, and observe if the reading fluctuates, which may point to unstable output. Interpreting results requires understanding that a voltage slightly above the battery’s rated voltage is normal during charging but excessive voltage risks damage.
Also, check for consistent polarity to confirm correct wiring. By precisely analyzing these factors, you can reliably assess the charger’s performance and identify whether repair or replacement is necessary.
Testing Battery Chargers With a Load Tester
How can you accurately determine if a battery charger is delivering the proper current under realistic conditions? Using a load tester allows you to assess the charger’s efficiency while simulating actual battery load demands. This method guarantees you measure performance beyond no-load voltage readings.
When testing with a load tester, focus on these key steps:
- Connect the load tester to the charger and set the load to match the battery’s rated current.
- Monitor the voltage drop and current output to evaluate if the charger maintains stable delivery.
- Observe safety considerations, such as preventing overheating and ensuring proper insulation to avoid electric shock or damage.
This approach provides a precise, analytical assessment of the charger’s real-world performance and operational safety.
Understanding What Your Test Results Mean
What do your measurements reveal about the charger’s functionality and reliability? Analyze voltage and current readings against manufacturer specifications to assess charging efficiency. Consistent voltage within the recommended range indicates proper operation, while significant deviations suggest inefficiency or potential faults.
Examine current stability under load; fluctuations may point to unstable output or internal component issues. Also, verify that the charger’s temperature remains within safe limits, respecting safety best practices to prevent overheating.
Use your data to confirm that the charger maintains regulated output without excessive ripple or noise, which can degrade battery health. By interpreting these parameters precisely, you can determine if the charger performs optimally and safely, ensuring long-term battery maintenance and reducing the risk of hazards during charging.
Spotting Common Battery Charger Problems
You’ll want to start by checking for overheating, which can indicate internal faults or poor ventilation.
Next, monitor the charger for inconsistent charging patterns that may signal faulty circuitry or connection issues.
Finally, inspect the unit for physical damage that could compromise its performance or safety.
Identifying Overheating Issues
Why does your battery charger feel unusually hot during operation? Overheating causes often stem from internal component stress or inadequate heat dissipation. You need to identify these issues promptly to prevent damage or failure. Focus on:
- Ventilation Blockage Dust or debris can obstruct airflow, reducing cooling efficiency.
- Faulty Cooling Strategies Malfunctioning fans or thermal pads fail to regulate temperature effectively.
- Excessive Load Charging batteries beyond the charger’s rated capacity generates excess heat.
Check the charger’s casing for warmth and ensure cooling vents are unobstructed. Use thermal imaging or a digital thermometer to pinpoint hotspots. By diagnosing overheating causes early and verifying cooling strategies, you can maintain optimal performance and extend your charger’s lifespan.
Detecting Charging Inconsistencies
How can you reliably identify charging inconsistencies that signal underlying battery charger problems? Focus on irregular voltage or current outputs, which can jeopardize battery safety and compromise thermal performance.
Use a multimeter to monitor these parameters during charging cycles. Sudden drops or spikes often indicate faulty circuitry or poor connections.
| Symptom | Potential Cause |
|---|---|
| Fluctuating voltage | Defective regulator |
| Inconsistent current | Loose wiring or contacts |
| Overheating charger | Inadequate thermal design |
Detecting these inconsistencies early prevents hazardous conditions and ensures efficient charger operation. Maintain strict observation of voltage stability and thermal behavior to uphold battery safety standards.
Recognizing Physical Damage
Although internal malfunctions can disrupt a battery charger’s performance, visible physical damage often provides immediate clues to underlying issues. When recognizing physical damage, you need to perform a thorough visual inspection. Focus on these three critical areas:
- Cracked or deformed casing: Structural damage can expose internal components to moisture or debris, risking short circuits.
- Damaged cables or connectors: Frayed wires, bent pins, or loose connections impair current flow and cause intermittent charging.
- Burn marks or corrosion: Signs of overheating or chemical damage indicate potential component failure or compromised safety.
Keeping Your Battery Charger in Top Shape
When should you perform maintenance on your battery charger to guarantee consistent performance? Regularly inspecting and cleaning your device is essential. Focus on maintaining connections by checking terminals and cables for corrosion or looseness, which can cause voltage drops and erratic charging.
Use a soft brush and isopropyl alcohol to remove oxidation without damaging contacts. Additionally, verify accessory compatibility to ensure you’re using the correct attachments and settings for your battery type, preventing overcharging or damage.
Periodically test output voltage with a multimeter to detect deviations from specified levels. Store the charger in a dry, dust-free environment to avoid moisture-induced corrosion.
Frequently Asked Questions
Can a Faulty Battery Charger Damage My Device?
Yes, a faulty battery charger can damage your device by causing potential hazards like overcharging or voltage spikes. You’ll notice performance drift, which may degrade battery life or harm internal components if unchecked.
How Often Should I Test My Battery Charger?
You should establish a testing cadence of every three months to ensure optimal performance. Regular maintenance checks reduce failure rates by up to 30%, helping you detect issues early and extend your charger’s lifespan effectively.
Are All Chargers Compatible With Every Device?
No, not all chargers guarantee charger compatibility with every device. You need to match voltage, current, and connector type precisely to ensure device safety and avoid damage.
Always verify specifications before connecting chargers.
What Safety Precautions Should I Take When Testing Chargers?
You conduct safety procedures, you perform risk assessment, and you wear protective gear. You ensure proper ventilation, you verify charger specifications, and you disconnect power before inspection.
These steps minimize hazards and ensure accurate, safe testing results.
Can Software Updates Affect Charger Performance?
Yes, software updates can improve firmware compatibility, enhancing power efficiency and optimizing charge cycles. However, incompatible updates might degrade performance. You should verify that the charger’s firmware supports the update before applying it.
Conclusion
Testing your battery charger is like tuning an engine—you need precision and care to ensure optimal performance. By inspecting for damage, verifying voltage with a multimeter, and testing under load, you can pinpoint issues before they escalate.
Regular maintenance, including cleaning contacts and monitoring temperature, keeps your charger reliable and safe. Stay vigilant, and your charger will deliver steady power, extending both its life and the devices it supports.
In conclusion, knowing how to test a battery charger properly ensures it works efficiently and lasts longer, providing dependable power when you need it most.