How to Change Oil and Oil Filter
You might think changing your oil and oil filter is too complicated or messy, but with the right tools and steps, you can handle oil and oil filter changes efficiently. This process not only helps maintain your engine’s performance but also extends its lifespan.
By warming the engine, safely lifting your car, and following precise procedures for draining and refilling, you’ll guarantee everything runs smoothly. Next, you’ll learn exactly how to prepare your workspace and avoid common pitfalls.
Key Takeaways
- Warm the engine, securely elevate the vehicle, and position a drain pan under the oil drain plug before removing it to drain old oil.
- Use an oil filter wrench to remove the old filter, allowing oil to drain, then lightly coat the new filter gasket before hand-tightening it.
- Add the correct type and amount of new oil using a funnel, then check for leaks around the filter and drain plug after installation.
- Verify oil level with the dipstick after the oil settles, inspect oil for contamination, and start the engine to check for unusual noises or leaks.
- Dispose of used oil and filters responsibly at authorized recycling centers to prevent environmental contamination and follow safety guidelines.
Tools You’ll Need to Change Your Oil and Filter
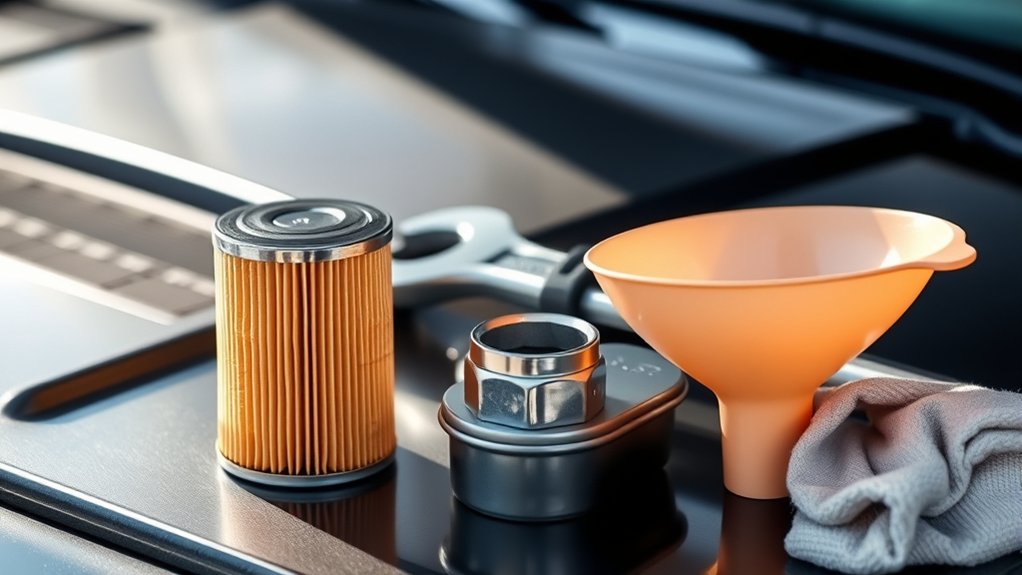
What tools do you need to change your oil and filter efficiently? First, gather a wrench set or an oil filter wrench specific to your vehicle’s filter size. You’ll also need a drain pan to catch used oil, and a funnel for pouring new oil.
Select the correct oil type by matching the recommended oil viscosity for your engine, which ensures optimal lubrication and performance. Using synthetic blends can improve engine protection and longevity, so have the appropriate synthetic blend oil ready.
Additionally, keep a new oil filter compatible with your car model on hand. Don’t forget gloves to protect your hands and rags for cleanup. With these precise tools and materials, you’ll streamline the oil change process while maintaining your engine’s health.
How to Prepare Your Car and Work Area Safely
After gathering the necessary tools and materials, focus on preparing your car and work area to ensure safety throughout the oil change. First, park your car on a flat, stable surface and engage the parking brake. If needed, use jack stands to lift the vehicle securely. Never rely solely on a jack.
Wear appropriate safety gear, including gloves and safety glasses, to protect your skin and eyes from hot oil and debris. Position absorbent mats or drip pans beneath the oil drain plug and filter to catch any spills. Have spill containment materials like absorbent pads or kitty litter on hand to manage accidental leaks promptly.
Ensure the work area is well-ventilated and free of clutter to prevent trips or falls. Following these steps will maintain a safe and efficient workspace.
How to Drain Old Oil and Remove the Filter
Start by positioning your oil drain pan under the oil drain plug to catch the used oil. Loosen and remove the drain plug carefully to let the oil flow out completely.
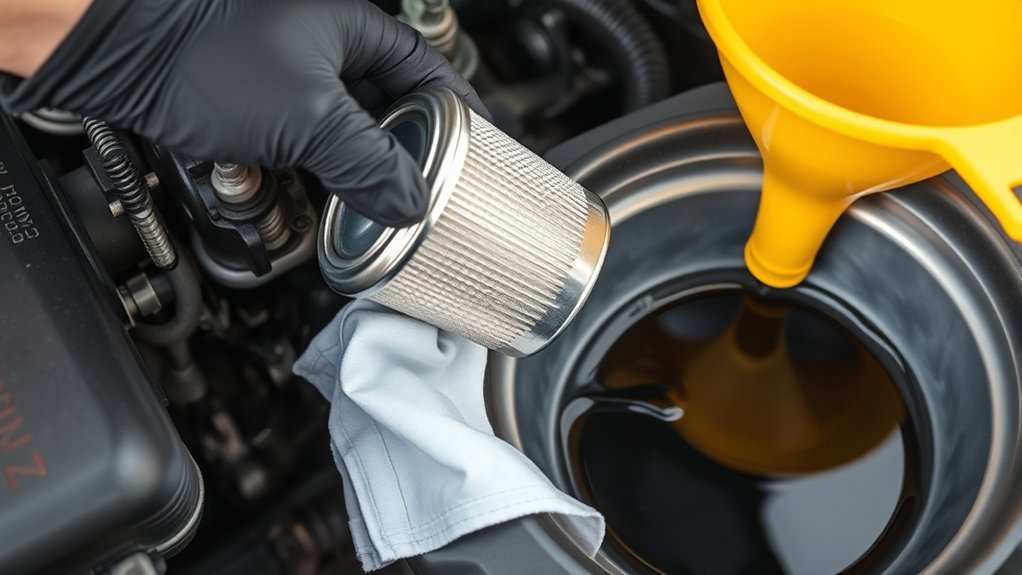
Once drained, use an oil filter wrench to unscrew the old filter, ensuring you have the pan underneath to catch any residual oil.
Preparing to Drain Oil
When should you begin draining the oil and removing the filter? Start only after the engine has warmed up slightly, ideally after running for 5-10 minutes. Warm oil drains more thoroughly, ensuring contaminants exit with it.
First, securely elevate your vehicle using jack stands or ramps for safe access beneath. Position an appropriate drain pan under the oil drain plug to catch the used oil.
Before loosening the plug, gather all necessary tools: a wrench for the drain plug, gloves, and rags for spills. Confirm you have a new oil filter ready to replace the old one.
Avoid starting to drain oil without these preparations, as it could lead to spills or incomplete drainage, complicating the removal process and potentially causing a mess.
Removing the Old Filter
How exactly do you remove the old oil filter without causing spills or damage? First, ensure the engine has cooled to avoid burns, as oil viscosity increases with temperature. Place a drain pan beneath the filter to catch residual oil.
Use an appropriate oil filter wrench to loosen the filter by turning it counterclockwise. As you unscrew it, expect some oil to spill. Note the filter color; discoloration may indicate contamination or wear. Carefully remove the filter, keeping it upright to minimize spillage.
Inspect the gasket area on the engine to ensure the old gasket isn’t stuck. Dispose of the old filter and oil according to local regulations. This method prevents mess, protects engine parts, and prepares you for installing the new filter efficiently.
How to Install a New Oil Filter and Add Fresh Oil
Where exactly should you position the new oil filter to guarantee a secure fit and prevent leaks? Align the filter’s threaded center hole with the engine’s mounting stud and screw it on by hand until the gasket contacts the base. Then, tighten it an additional three-quarters to one full turn. Avoid overtightening, which risks damaging the gasket or mounting threads.
Before installing, lightly coat the filter gasket with fresh oil to ensure a proper seal. Next, add the recommended amount of fresh oil, paying close attention to the specified oil viscosity for your engine. Using the correct viscosity reduces engine noise and ensures optimal lubrication.
After adding oil, double-check for leaks around the filter base. Proper installation prevents leaks and ensures your engine runs smoothly without excessive noise or wear.
How to Check Oil Levels Correctly After Changing
After adding fresh oil, locate the dipstick and pull it out to check the level. Wipe it clean, reinsert it fully, then remove it again to read the accurate oil level.
Inspect the oil on the dipstick for any signs of contamination or discoloration before finishing.
Locate The Dipstick
When you want to verify the oil level, start by locating the dipstick under the hood. The dipstick typically has a brightly colored handle, yellow or orange, for easy identification. Pull it out slowly and wipe it clean with a lint-free cloth before reinserting it fully.
This step is crucial to avoid inaccurate readings. Understanding the dipstick’s location and proper use minimizes risky repairs and reduces common DIY risks associated with oil checks.
Avoid guessing or skipping this step, as misreading oil levels can damage your engine. If you’re unfamiliar with your vehicle’s layout, consult the owner’s manual to prevent errors.
Correctly identifying the dipstick sets a solid foundation for accurate oil level assessment after your oil change.
Read Oil Level
How exactly do you read the oil level correctly after changing the oil? First, guarantee the engine is off and has been off for a few minutes to allow oil to settle.
Pull out the dipstick, wipe it clean with a lint-free cloth, then reinsert it fully. Pull it out again and observe the oil level against the marked indicators. The oil should sit between the minimum and maximum marks.
Use the recommended oil grade specified in your vehicle’s manual to maintain optimal fuel economy and engine performance. If the level is low, add oil gradually, rechecking to avoid overfilling.
Accurate oil level reading ensures proper lubrication and prevents engine damage, so always verify this step carefully after an oil change.
Check For Contamination
Verifying the oil level alone doesn’t guarantee the oil’s condition is sound. After filling, inspect the oil’s color and texture to check for contamination. Use a clean white cloth or paper towel to wipe a small amount of oil from the dipstick.
Look for signs of contaminant particles such as metal shavings, dirt, or sludge. The oil should be clear and consistent in color; milky or frothy oil may indicate coolant contamination. Also, assess the oil viscosity by rubbing a small amount between your fingers. It should feel smooth, not gritty or overly thick.
If you detect abnormalities, do not proceed without further investigation. Properly checking for contamination ensures your engine runs efficiently and prolongs its lifespan by preventing premature wear or damage.
How to Dispose of Used Oil and Filters Safely
Since improper disposal of used oil and filters can harm the environment and violate regulations, you must follow specific procedures to handle them safely. First, drain the used oil completely into a clean, sealable container to prevent spills.
Properly drain used oil into a clean, sealable container to prevent spills and protect the environment.
Store used oil and filters separately in leak-proof, labeled containers to maintain disposal safety. Never mix oil with other fluids, as contamination complicates recycling.
Take both the oil and filters to an authorized recycling center or hazardous waste facility promptly. These centers ensure proper treatment, minimizing environmental impact.
Avoid disposing of oil or filters in regular trash, drains, or soil. By adhering to these steps, you comply with environmental regulations and reduce pollution risks, ensuring responsible disposal safety for used oil and filters.
How Often to Change Your Oil and Filter
Regularly changing your oil and filter is essential to maintaining engine performance and longevity. The frequency depends on several factors, including your vehicle’s requirements and the type of oil you use. Here’s what to consider:
Oil viscosity: Thicker oils may require longer intervals, but always follow manufacturer guidelines.
Synthetic vs conventional: Synthetic oils generally last longer, allowing 7,500 to 10,000 miles between changes, while conventional oils often need changing every 3,000 to 5,000 miles.
Driving conditions: Frequent short trips, stop-and-go traffic, or extreme temperatures may necessitate more frequent changes.
Vehicle age and mileage: Older engines or high-mileage vehicles might benefit from shorter intervals to maintain optimal protection.
Always consult your owner’s manual for precise intervals tailored to your engine and oil type.
Common Mistakes to Avoid When Changing Oil and Filter
How can you guarantee your oil change goes smoothly without causing damage to your engine? Avoid these common mistakes: overtightening the oil filter leads to incorrect torque, risking damage or leaks. Under-tightening causes misleading leaks. Neglecting to replace the drain plug gasket can also cause leaks. Always dispose of old oil properly.
| Mistake | Consequence | Solution |
|---|---|---|
| Incorrect torque | Damage or misleading leaks | Use torque wrench to spec |
| Missing gasket | Oil leaks | Replace drain plug gasket |
| Skipping filter prep | Poor seal, leaks | Lubricate filter gasket before install |
How to Tell If Your Oil Change Was Successful
Wondering if your oil change was done correctly? To confirm success, check these critical indicators:
- Oil Level: Use the dipstick to ensure oil reaches the recommended mark without overfilling.
- Oil Viscosity: Confirm the oil’s viscosity matches manufacturer specifications, especially if you used synthetic blends for optimal engine protection.
- No Leaks: Inspect beneath the vehicle and around the filter and drain plug for any signs of oil leakage.
- Engine Performance: Start the engine and listen for unusual noises or vibrations that might indicate improper oil circulation.
If all these points check out, your oil change was successful. Remember, using the correct oil viscosity and synthetic blends helps maintain engine efficiency and longevity. Regular verification ensures you avoid costly engine damage.
Frequently Asked Questions
What Type of Oil Is Best for My Specific Vehicle Model?
You should choose oil viscosity recommended in your vehicle’s manual to ensure optimal fuel efficiency and engine protection. Using the specified oil grade maintains performance, improves fuel economy, and prevents wear under various operating conditions.
Can I Reuse an Old Oil Filter for a Quick Top-Up?
You shouldn’t reuse an old filter because it’s clogged with contaminants. Using an old filter risks engine damage and reduces oil flow.
Always replace the oil filter when changing or topping up oil for proper protection.
How Does Synthetic Oil Compare to Conventional Oil?
In a synthetic vs conventional comparison, synthetic oil offers superior stability, better high-temperature performance, and longer intervals between changes. You’ll find it reduces engine wear more effectively, though it usually costs more than conventional oil.
What Are the Signs of Engine Damage From Old Oil?
You’ll notice engine wear accelerating by up to 20% with old oil, plus oil leaks around seals.
Pay attention to rough idling, knocking sounds, and decreased fuel efficiency. These signs indicate serious engine damage from degraded oil.
Can I Change My Oil in Cold Weather Conditions?
You can change your oil in cold weather, but ensure proper cold weather maintenance by selecting the correct oil viscosity.
Thinner oils flow better at low temperatures, so choose a viscosity grade suited for your climate to protect your engine.
Conclusion
Now that you’ve replaced the old, dark oil with fresh, amber fluid and snugged the new filter into place, picture your engine running smoothly, protected against wear. By following each step carefully—draining, tightening, refilling—you ensure your car’s heart beats strong and clean.
Regular oil changes keep your engine’s performance sharp and reliable, preventing damage before it starts. Trust this routine to maintain your vehicle’s health and extend its life with precision and care.
In conclusion, performing an oil change and oil filter replacement regularly is essential to keep your engine running at its best and to avoid costly repairs down the road.