How to Hook up a Battery Charger
Before you start hooking up a battery charger, you need to prepare properly to ensure safety and effectiveness. Hooking up a battery charger correctly involves gathering the right protective gear and tools, confirming your battery type, and inspecting the terminals for corrosion or damage.
Connecting the charger cables correctly is crucial to avoid sparks or damage. Understanding these initial steps will help you avoid common mistakes and get the most out of your charging process. Taking these precautions makes the entire procedure safer and more efficient.
Key Takeaways
- Identify battery terminals and wear insulated gloves and safety goggles before starting the hookup process.
- Connect the red clamp to the positive (+) terminal firmly, ensuring no contact with other metal parts.
- Attach the black clamp to the negative (−) terminal or a designated grounding point securely.
- Confirm charger voltage matches battery rating (6V, 12V, or 24V) and select the appropriate charging mode.
- Double-check all connections and settings before powering on the charger to begin charging safely.
Gather Safety Gear and Battery Charging Tools
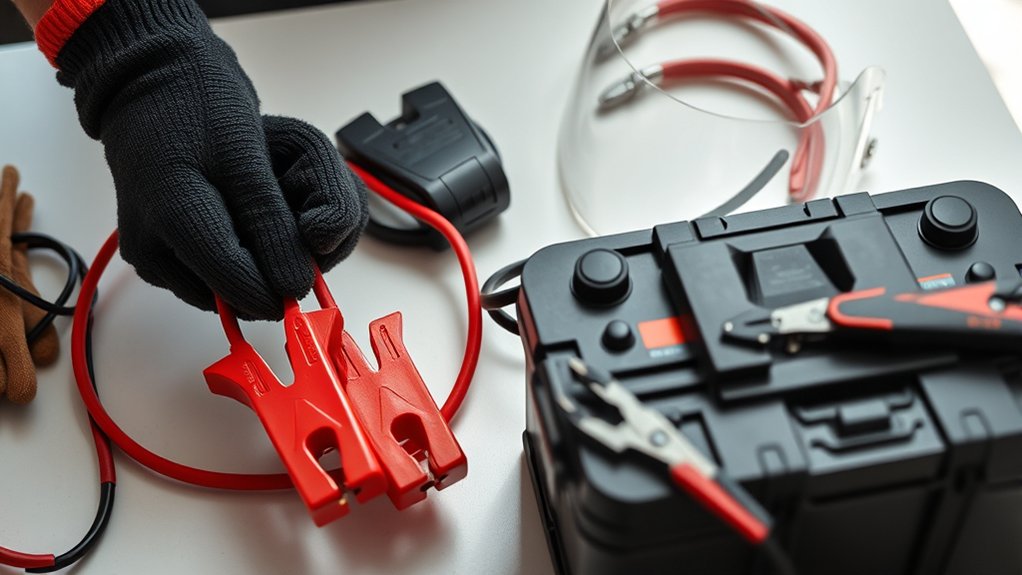
Before you begin charging a battery, what safety gear and tools do you need to gather? Prioritize battery safety by equipping yourself with insulated gloves and safety goggles to protect against acid splashes and sparks. Ensure you have a well-ventilated workspace to prevent gas buildup.
For tool organization, prepare a battery charger with clearly labeled clamps, a multimeter to check voltage, and a wire brush to clean terminals. Keep all tools within easy reach on a non-conductive surface to avoid accidental shorts. Avoid metal jewelry to reduce shock risk.
Organizing your tools systematically prevents delays and safety hazards during charging. By assembling proper safety gear and maintaining tool organization, you create a controlled environment that minimizes risks and ensures efficient battery charging.
Locate and Inspect Your Car Battery
Where exactly is your car battery located, and how can you perform a thorough inspection? Typically, you’ll find the battery under the hood, near the front of the engine compartment, but some vehicles place it in the trunk or under a seat.
Your car battery is usually under the hood, though some models locate it in the trunk or under a seat.
Before inspecting battery terminals and casing, put on your safety gear: gloves and goggles to protect against acid and sparks. Begin inspecting battery for corrosion, cracks, or leaks on the casing. Check the terminals for buildup or loose connections.
Use a wire brush if necessary to clean corrosion. Also, ensure the battery is securely mounted to prevent vibration damage. If you spot swelling or significant damage, do not proceed; replace the battery first.
Proper inspecting battery sets the foundation for safe, effective charging.
Choose Your Battery Charger Type
How do you determine which battery charger suits your needs? First, identify your battery type: lead-acid, AGM, or lithium, as chargers vary accordingly. Next, consider charging speed. A faster charger reduces wait time but may risk battery damage if not compatible.
Use the chart below to select the appropriate charger type based on your battery type and desired charging speed:
| Battery Type | Recommended Charger Type |
|---|---|
| Lead-acid | Standard or Smart Charger |
| AGM | Smart Charger with AGM mode |
| Lithium | Charger designed for Lithium |
Choosing the right charger ensures efficient, safe charging. Always verify the charger’s specifications match your battery’s voltage and capacity for optimal performance.
Clean and Prepare Battery Terminals and Charger
Start by inspecting the battery terminals for any signs of corrosion or damage. Use a proper cleaning solution and tools to remove corrosion safely without damaging the terminals.
Finally, ensure the charger connectors are clean and free of debris before attaching them to the battery.
Inspect Battery Terminals
Before connecting the battery charger, carefully inspect the battery terminals for corrosion, dirt, or damage. Proper inspection ensures a secure connection and efficient charging.
When you inspect terminals, follow these steps:
- Visually examine both positive and negative terminals for white, green, or blue powdery deposits indicating corrosion.
- Check for loose or damaged terminal clamps that can affect current flow and pose safety risks.
- Assess the battery posts for cracks or excessive wear that might compromise the connection.
Identifying these issues early allows you to plan corrosion removal or hardware replacement before charging. Maintaining clean, intact terminals is essential for optimal charger performance and battery longevity.
Always perform this inspection in a well-ventilated area with appropriate safety measures.
Remove Corrosion Safely
Once you’ve identified corrosion on the battery terminals, you’ll need to remove it carefully to guarantee a reliable connection and prevent damage. Begin by wearing protective gloves and eyewear.
Disconnect the negative terminal first, then the positive. Use a battery terminal cleaner or a wire brush to scrub away corrosion buildup thoroughly. For stubborn deposits, apply a mixture of baking soda and water to neutralize acid residue, then rinse with clean water and dry completely.
Avoid metal tools that could short the terminals. After cleaning, inspect terminals for damage and replace if necessary.
Applying a thin layer of petroleum jelly helps with corrosion prevention. Incorporate this step into your regular maintenance routines to extend battery life and ensure optimal charger performance.
Clean Charger Connectors
How exactly do you guarantee the charger connectors make a solid, safe connection with the battery terminals? Ensuring clean connectors is critical to prevent poor contact and battery corrosion, which can impede charging efficiency.
Follow these steps precisely:
- Inspect the charger clamps for dirt or oxidation; use a wire brush or fine sandpaper to clean the metal surfaces thoroughly.
- Examine the battery terminals for any residual battery corrosion; clean them with a mixture of baking soda and water, then rinse and dry completely.
- After cleaning, apply a thin layer of dielectric grease or petroleum jelly on both the terminals and charger connectors to inhibit future corrosion and ensure a reliable electrical connection.
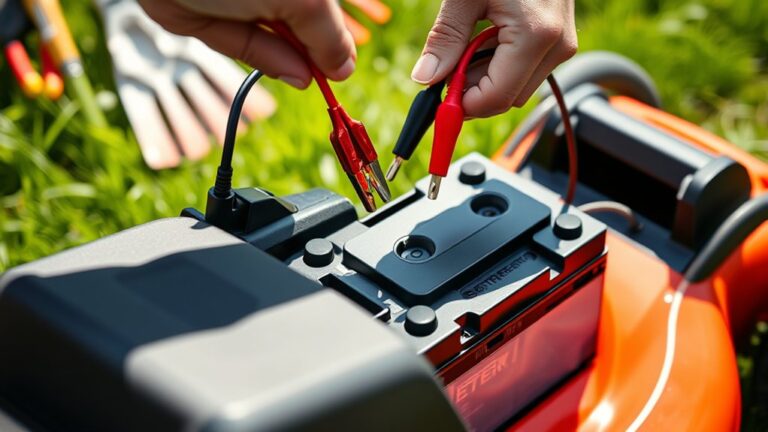
Connect the Charger Cables to the Battery Correctly
First, identify the battery’s positive (+) and negative (-) terminals to avoid connection errors. Attach the red clamp securely to the positive terminal before connecting the black clamp to the negative terminal.
Make sure both clamps are firmly in place to ensure a proper charge and prevent sparks.
Identify Positive And Negative
Where do you connect the charger cables to guarantee proper battery charging? First, you must identify polarity to ensure battery safety and prevent damage. Follow these steps precisely:
- Locate the positive terminal, marked with a plus sign (+) or red coloring.
- Find the negative terminal, indicated by a minus sign (–) or black coloring.
- Verify terminals are clean and free of corrosion for optimal connection.
Correctly identifying positive and negative terminals is crucial. Connecting cables incorrectly can cause sparks, short circuits, or permanent battery damage. Always double-check the markings before proceeding.
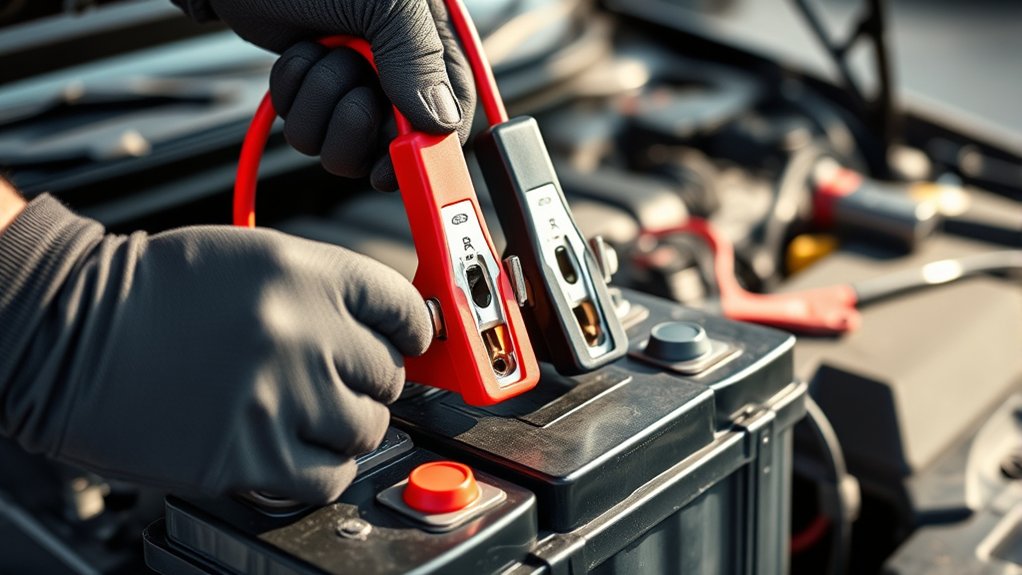
Attach Red Clamp First
Why start by attaching the red clamp? Connecting the red clamp first to the positive terminal is crucial for proper charging etiquette and maintaining battery health. This step minimizes the risk of sparks and short circuits.
Ensure the clamp securely grips the terminal without touching other metal parts.
| Step | Reason |
|---|---|
| Attach Red Clamp | Prevents sparks and shorts |
| Secure Connection | Ensures consistent charging |
| Identify Terminal | Avoids polarity mistakes |
| Check Battery Health | Prolongs battery lifespan |
| Follow Charging Etiquette | Ensures safety and effectiveness |
Secure Black Clamp Last
After securing the red clamp to the positive terminal, attach the black clamp to the negative terminal or an appropriate ground point on the vehicle. This step is essential for battery safety and proper charging etiquette. Connecting the black clamp last minimizes spark risk and prevents short circuits.
Follow these guidelines:
- Identify a clean, unpainted metal surface away from the battery as the grounding point if not connecting directly to the negative terminal.
- Confirm the clamp firmly grips the terminal or ground to maintain solid electrical contact.
- Avoid touching clamps together or allowing them to contact the battery terminals simultaneously.
Set the Charger’s Voltage and Mode
How do you guarantee your battery charger delivers the correct power for your battery? Start by confirming the battery’s voltage rating, then proceed to voltage selection on your charger. Most chargers allow you to toggle between 6V, 12V, or 24V settings. Choose the one matching your battery.
Next, configure the charging mode. Chargers typically offer modes like trickle, fast, or maintenance charging. Select the mode based on your battery’s condition and manufacturer recommendations. For instance, use trickle mode for long-term maintenance and fast mode for quick charging.
Proper voltage selection and mode configuration ensure safe, efficient charging, preventing damage. Double-check all settings before proceeding. This step is critical to protect both the battery and charger from electrical faults or overheating during the charging process.
Start Charging and Monitor Safely
When do you begin charging your battery, and what should you watch for? Once you’ve confirmed the correct voltage settings and connection steps, put on safety gear and ensure your battery tools are ready. Different charger types require specific monitoring to avoid overcharging or damage.
- Perform a terminal inspection to check for corrosion; remove any buildup before starting.
- Start the charger, observe the voltage and current display, and track the charging rate closely.
- Clean the charger contacts periodically during charging to maintain efficient operation.
Monitor for unusual heat or odors, and follow troubleshooting tips if the charge deviates. After charging, conduct a post charge test to verify battery performance. Always adhere strictly to safety protocols and avoid premature disconnection procedure.
Disconnect the Charger Without Damaging the Battery
When disconnecting the charger, always remove the negative cable first to prevent sparks and short circuits. Make sure the charger is turned off before unplugging any connections to protect both you and the battery.
Follow these safety steps carefully to avoid damaging the battery or causing injury.
Proper Disconnection Sequence
A proper disconnection sequence ensures you remove the battery charger without causing damage to the battery or electrical system. Following battery safety and charging etiquette is crucial to maintain battery health and prevent electrical hazards.
Here’s the correct procedure:
- Turn off the charger and unplug it from the power source to eliminate any current flow.
- Disconnect the negative (black) clamp first to reduce the risk of sparks near the battery.
- Finally, remove the positive (red) clamp, ensuring no metal contacts the battery terminals.
This sequence prevents short circuits and preserves the battery’s integrity. Always handle clamps carefully to avoid accidental contact, which could compromise battery safety. Adhering to these steps enhances charging etiquette and prolongs your battery’s lifespan.
Safety Precautions During Removal
Following the proper disconnection sequence minimizes the risk of sparks and short circuits, but you still need to take specific safety precautions to protect the battery during charger removal. Always ensure the charger is turned off before disconnecting the clamps.
Remove the negative clamp first, then the positive, to avoid creating an electrical path that could cause damage. Avoid skipping steps or using an unused safety protocol that might compromise your safety or the battery’s integrity.
Inspect the battery terminals for corrosion or damage; if present, address these before reconnecting or disposing of the battery. When the battery is no longer serviceable, follow proper battery disposal procedures to prevent environmental harm.
Adhering strictly to these precautions ensures you disconnect the charger safely without damaging the battery.
Test Your Battery and Vehicle After Charging
Begin by ensuring the battery charger is disconnected safely and the vehicle’s ignition is off. This prevents electrical hazards and preserves system integrity.
Next, perform diagnostic testing to confirm the battery’s health and the vehicle’s electrical system functionality. Follow these steps:
- Use a multimeter to measure the battery voltage; a fully charged battery should read around 12.6 volts.
- Start the vehicle and observe the voltage drop; it should remain above 10 volts during cranking.
- Inspect the battery terminals and cables for corrosion or looseness, essential for ongoing battery maintenance.
Completing these tests verifies the charging process was effective and helps identify any underlying electrical issues requiring attention.
Troubleshoot Common Battery Charger Issues
Why isn’t your battery charger working as expected? First, ensure your charger is correctly connected. Double-check the polarity of the clamps to prevent damage. Inspect the charger cables for frays or corrosion that can interrupt current flow.
If the charger doesn’t power on, verify the outlet and fuse status. During DIY charging, use a multimeter to confirm the charger outputs the specified voltage. If charging stalls, the battery may be sulfated or too discharged; consult battery safety guidelines before proceeding.
Always disconnect the charger before handling the battery to prevent sparks. Lastly, clean battery terminals to improve contact. Troubleshooting these common issues helps maintain efficient charging and prolongs battery life while ensuring your safety throughout the process.
Frequently Asked Questions
How Often Should I Charge My Car Battery?
You should adjust your charging frequency based on usage and battery health, typically every few months. Always ensure indoor charging safety by using a well-ventilated area and following manufacturer guidelines to prevent hazards during charging sessions.
Can I Charge a Frozen Car Battery?
You shouldn’t cold start charging a frozen car battery, as it risks damage. Instead, let the battery thaw completely before using portable chargers. This ensures safe, efficient charging without compromising battery integrity or performance.
What Are the Signs of a Failing Battery Charger?
If your charger’s light flickers like a candle in the wind, that’s a sign of failure. You’ll also notice slow charging or overheating.
Always verify charger compatibility to avoid damaging your battery or charger.
Is It Safe to Charge a Battery Indoors?
Yes, you can charge a battery indoors if you follow safety guidelines. Ensure proper ventilation to prevent gas buildup, use a charger with automatic shutoff, and keep the area free of flammable materials during indoor charging.
Can a Battery Charger Damage My Car’s Electrical System?
Yes, improper use of a battery charger can damage your car’s electrical system. To avoid charging hazards, ensure correct polarity, use a compatible charger, and follow strict electrical safety guidelines during the charging process.
Conclusion
Now that you’ve mastered hooking up a battery charger, you’re practically a battery whisperer—capable of reviving dead batteries faster than a lightning bolt! Just remember, precise connections and vigilant monitoring aren’t optional—they’re your lifelines.
Skip a step, and you might as well try charging your phone with a banana. Follow these exact instructions every time, and you’ll keep your battery powerful, reliable, and ready to roar whenever you turn the key.
By sticking to these guidelines for how to hook up a battery charger, you ensure your battery stays in top shape and performs when you need it most.