
How Tight Should an Oil Filter Be
You need to tighten your oil filter just enough to create a proper seal without risking damage. Properly tightening an oil filter ensures a secure fit and prevents leaks.
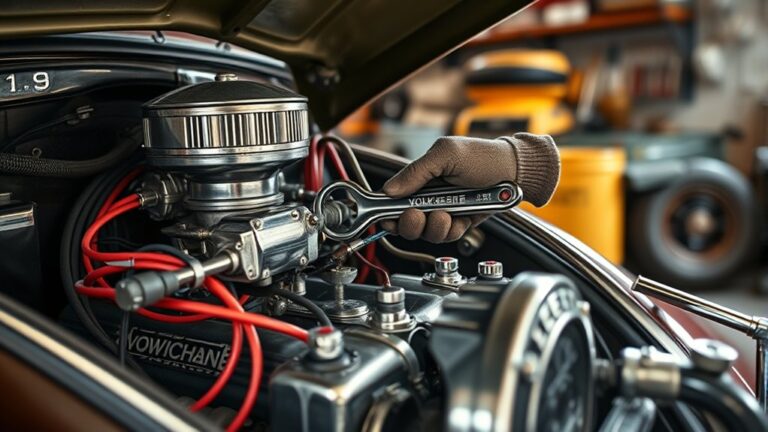
Hand-tighten until the gasket meets the mounting surface, then add about three-quarters to one full turn, or follow the manufacturer’s torque specs if available.
Too much force can crush the gasket or strip threads, while too little invites leaks and pressure loss. Understanding this balance is key to a reliable oil change—so how do you get it right?
Always aim for a snug fit without over-tightening to maintain engine health and avoid costly repairs.
Key Takeaways
- Hand-tighten the oil filter until the gasket contacts the base, then tighten an additional ¾ to 1 full turn using a wrench.
- Use manufacturer-specified torque values, typically between 15 to 30 ft-lbs, for precise and secure filter installation.
- Apply a thin layer of clean oil to the filter gasket before installation to ensure proper sealing and prevent leaks.
- Avoid over-tightening to prevent gasket crushing and under-tightening to avoid oil leaks and contamination risks.
- Verify torque with a calibrated wrench after installation and inspect for leaks after engine startup to ensure proper tightness.
Why Proper Oil Filter Tightness Matters

Why does the tightness of your oil filter matter? If it’s too loose, oil can leak, causing pressure drops that affect engine performance. Too tight, and you risk damaging the filter or its housing, complicating future removal during maintenance scheduling.
Proper tightness ensures a secure seal, preventing contaminants from entering the engine and maintaining optimal oil pressure. This stability directly influences fuel efficiency, as the engine runs smoothly without interruptions caused by oil flow issues.
Additionally, correct filter tightness helps maintain consistent lubrication, reducing wear on engine components. By adhering to precise tightness standards, you avoid costly repairs and keep your vehicle operating efficiently, aligning with your maintenance scheduling to maximize both engine longevity and fuel economy.
What Torque Should You Use on Your Oil Filter?
How tight should you torque your oil filter to ensure a proper seal without causing damage? The answer depends on your vehicle’s specifications, typically ranging between 15 to 30 ft-lbs.
Precision tightening is crucial; over-tightening can strip threads or deform the gasket, while under-tightening risks leaks. Always consult the manufacturer’s torque values and use a calibrated torque wrench to achieve torque accuracy.
Proper torque prevents leaks and damage; always follow manufacturer specs with a calibrated wrench.
Apply a thin layer of oil to the filter gasket before installation to improve sealing and ease removal. Hand-tighten the filter until the gasket contacts the mounting surface, then apply the specified torque with the wrench.
This controlled approach balances sealing integrity and component longevity, ensuring your oil filter performs reliably without mechanical damage.
How to Know When Your Oil Filter Is Tight Enough?
Determining when your oil filter is tight enough requires careful attention to both tactile feedback and manufacturer guidelines. You want to avoid oil leaks but also prevent over-tightening.
After hand-tightening the filter, use a wrench to turn it an additional ¾ to 1 full turn, as specified by most manufacturers. If you feel resistance increasing sharply, stop immediately.
| Step | Action |
|---|---|
| 1 | Clean filter sealing surface |
| 2 | Hand-tighten filter |
| 3 | Use wrench for ¾–1 turn |
| 4 | Check for resistance |
| 5 | Inspect for oil leaks |
This method balances two word discussion ideas: “tightness” and “leak prevention,” ensuring a secure fit without damage.
Common Oil Filter Tightening Mistakes
When tightening an oil filter, what common mistakes do people often make that compromise the seal or damage the filter? One frequent error is overtightening, which crushes the gasket or damages the filter threads, leading to leaks.
Conversely, undertightening leaves the seal loose, causing oil seepage. Another mistake is failing to lubricate the gasket with fresh oil before installation, which hinders proper sealing.
Some also reuse old filters, an irrelevant topic that distracts from proper maintenance practices. Avoid focusing on off topic concepts like filter brand myths instead of correct torque application.
Lastly, cross-threading the filter during installation damages both the filter and housing, compromising the seal. By steering clear of these mistakes, you ensure a secure fit and prevent oil leaks or engine damage.
Tools That Make Tightening Your Oil Filter Easier
You’ll find several tools designed to make oil filter tightening more efficient, with filter wrenches being the most common. These tools help you apply consistent torque without damaging the filter or your hands.
Selecting the right tool depends on your filter type and engine accessibility.
Common Oil Filter Tools
How can you ensure a secure fit without over-tightening an oil filter? Using the right tools is essential for DIY car maintenance and precise engine diagnostics. Common oil filter tools help you apply consistent torque, preventing leaks or damage.
Here are the most effective tools for the job:
- Strap wrench: Provides grip without damaging the filter surface.
- Oil filter pliers: Adjustable jaws for tight spaces and various filter sizes.
- Cap-style filter wrench: Fits over the filter’s end for even pressure.
- Socket wrench adapter: Allows use of a torque wrench for exact tightness.
- Oil filter removal cup: Secures the filter for easy twisting on or off.
These tools simplify installation, ensuring your oil filter is tight enough for optimal engine performance.
Benefits of Filter Wrenches
Why struggle with gripping a slick, tight oil filter when a filter wrench can simplify the job? Filter wrenches provide enhanced grip and leverage, allowing you to apply the correct torque without damaging the filter or your hands.
During oil changes, precision is crucial; overtightening can cause filter distortion, while under-tightening risks leaks. Using a filter wrench ensures consistent tightening, protecting your engine and maintaining optimal oil pressure.
For those invested in automotive hobbies, this tool streamlines routine maintenance, saving time and reducing frustration. Filter wrenches come in various designs, such as band, cap, and plier types, each tailored for specific filter sizes and accessibility.
Choosing The Right Tool
Which tool fits your oil filter best? Selecting the right tightening instrument ensures a proper seal without risking damage. Your vehicle’s oil capacity and whether you use synthetic vs. conventional oil influence filter size and torque requirements. Choose a tool that accommodates these variables for a secure fit.
Consider these options:
- Strap wrench: adapts to various filter sizes, prevents surface damage
- Chain wrench: offers strong grip for stubborn filters
- Cap wrench: fits specific filter models, ensures even torque
- Pliers-style wrench: adjustable, good for limited space
- Socket wrench adapter: integrates with standard ratchet sets
Using the correct tool avoids overtightening, which can cause leaks or damage, and under-tightening, which risks filter dislodgment, especially with high oil capacity engines or synthetic oil requiring precise filtration.
What Happens If You Over-Tighten or Under-Tighten Your Oil Filter?
If you over-tighten your oil filter, you risk damaging the gasket and making future removal difficult.
Under-tightening can cause leaks and reduce engine protection. You need to apply the correct torque and follow proper tightening techniques to ensure a secure, leak-free seal.
Effects Of Over-Tightening
What happens when you over-tighten or under-tighten your oil filter can greatly impact your engine’s performance and longevity. Over tightening risks include damaging the filter seal, which compromises the seal’s integrity and can lead to leaks.
Applying excessive torque can also deform the filter housing, causing improper fitment. You might strip the threads on the mounting surface, resulting in costly repairs.
Additionally, an over-tightened filter becomes difficult to remove, potentially damaging the filter during future maintenance. Lastly, over-tightening can restrict oil flow, reducing lubrication efficiency and increasing engine wear.
- Filter seal damage from excessive torque
- Deformation of filter housing
- Stripped mounting threads
- Difficult removal on next service
- Restricted oil flow impacting lubrication
Risks Of Under-Tightening
Just as over-tightening an oil filter can cause damage, under-tightening poses its own set of risks that can compromise your engine’s performance. When you don’t tighten the filter enough, it may fail to achieve proper sealing, allowing oil to leak.
These under tightening risks include oil pressure loss, contamination ingress, and potential engine damage due to insufficient lubrication. Improper sealing can also allow dirt and debris to bypass the filter, accelerating engine wear.
Additionally, a loosely fitted filter can vibrate loose over time, increasing leakage risks. Addressing these issues is critical because even minor leaks reduce oil efficiency and can lead to costly repairs.
To avoid these problems, always ensure the oil filter is sufficiently tightened to form a secure, leak-free seal.
Proper Tightening Techniques
How tightly you secure your oil filter directly impacts engine reliability and longevity. Proper tightening ensures optimal oil filtration and prevents leaks or damage. Over-tightening risks crushing the filter’s seal, causing deformation or difficulty during removal.
Under-tightening can lead to oil leaks, reduced filtration efficiency, and engine contamination.
Follow these proper tightening techniques for effective engine maintenance:
- Apply a thin layer of clean oil to the filter gasket before installation
- Hand-tighten the filter until the gasket contacts the base
- Use manufacturer-specified torque or a ¾ to 1 turn after gasket contact
- Avoid using tools that might over-tighten or damage the filter
- Inspect for leaks after engine startup and adjust if necessary
Adhering to these steps maintains oil filtration integrity and prolongs engine life.
How to Remove a Stuck Oil Filter Safely
When dealing with a stuck oil filter, you’ll need the right tools and techniques to avoid damage. Start by ensuring the engine is cool to prevent burns. Use an oil filter wrench that fits snugly to apply even torque without slipping.
Turn the filter counterclockwise with steady pressure. If it remains stuck, try penetrating oil around the base to loosen the seal, allowing it to sit for a few minutes. Avoid excessive force that can damage the mounting surface.
If necessary, tap the filter gently with a rubber mallet to break the seal. Always wear gloves and eye protection when handling oil and tools. Following these safely techniques will help you remove the filter cleanly without harming components or causing injury.
Tips to Replace Your Oil Filter Leak-Free
After safely removing a stuck oil filter, focus on installing the new one to prevent leaks and guarantee proper engine function. Proper installation ensures a tight seal and avoids costly oil loss or engine damage.
Follow these tips for a leak-free replacement:
- Lubricate the new filter’s gasket with clean oil to ensure a proper seal.
- Hand-tighten the filter, then turn an additional 3/4 to 1 full turn; avoid over-tightening.
- Inspect the sealing surface on the engine for old gasket remnants.
- Perform oil sampling before and after to monitor oil quality and detect potential leaks early.
- Dispose of the used filter responsibly through filter recycling programs to protect the environment.
Following these steps ensures a secure fit and maintains engine reliability.
Frequently Asked Questions
Can I Use Any Brand of Oil Filter for My Vehicle?
You can use different brands, but ensure oil filter compatibility with your vehicle specifications. Brand diversity offers options, yet selecting a filter meeting OEM standards guarantees proper fit, filtration efficiency, and engine protection.
Always verify compatibility first.
How Often Should I Change My Oil Filter?
You might think changing your oil filter too often wastes money, but good oil filter etiquette means replacing it every oil change. This is typically every 3,000 to 7,500 miles.
These discussion ideas keep your engine protected and efficient.
What Type of Oil Is Best for My Car?
You should use the oil type specified in your owner’s manual to ensure optimal engine performance. Proper filter fitment is crucial to maintain oil flow and prevent leaks, so always match the filter to your car’s model.
Can a Reusable Oil Filter Be Tightened Like a Disposable One?
As you twist the reusable oil filter on, note that its tightening technique differs from disposables; you’ll want to tighten it snugly but avoid over-torquing to preserve reuse considerations and maintain proper sealing without damage.
Does Oil Filter Size Affect Engine Performance?
Yes, oil filter size affects engine performance. You need to ensure the filter fit matches your engine’s specifications.
Brand compatibility matters too. Using the right size and brand prevents leaks, maintains proper oil flow, and protects your engine efficiently.
Conclusion
Think of tightening your oil filter like sealing a handshake—firm, confident, but never crushing. Hand-tighten until the gasket seats, then add about three-quarters of a turn with a wrench, matching specs precisely. Too tight, and you risk damage; too loose, and leaks creep in like shadows.
By mastering this balance, you ensure your engine’s heartbeat stays steady—secure, sealed, and ready to run smoothly without fail. Knowing how tight should an oil filter be is key to maintaining engine health and preventing leaks.